With Christmas just around the corner, we thought we would put together our top 5 Christmas craft ideas to do with kids during the festive season. Some of our favourite Christmas decorations are ones we’ve made with them over the years. They also love doing arts and crafts so combining it with Christmas is a real treat for them. Here are some of our favourite Christmas craft ideas among our team:
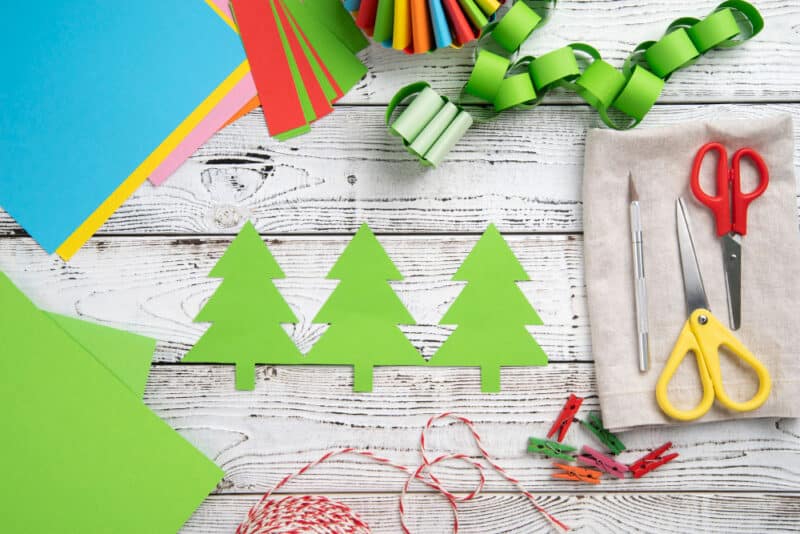
Christmas tree paper chains
Our kids love creating paper chains. Why not create a festive version with these Christmas tree paper chains, which are super easy to create.
To make your Christmas Tree paper chains start by taking some green A4 paper and folding it in half lengthways. Once you have made this fold, cut along the folded line so you end up with two halves, each measuring about 10cm wide by 30cm long.
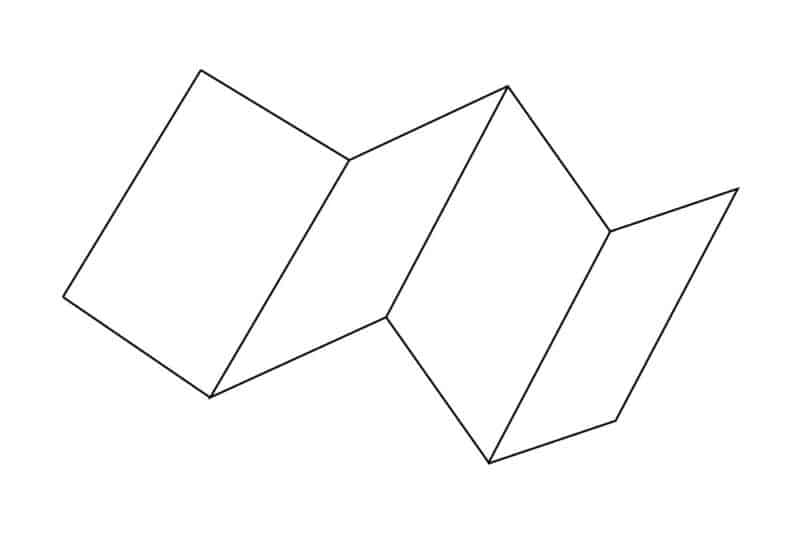
Taking one of these sheets, fold the sheet in half and then half again so you have 4 sections. Crease each fold firmly and then fold the sections back out. The only trickiness is then folding this section so your Christmas trees will join. To do this, you need to make sure the sheet is folded in half in the middle, and then the next fold needs to fold back on itself. You’ll know if you’ve got this right as you should be able to form a ‘W’ shape with the paper (see below).
Once ready, flatten the paper back down the folds to form one small section. Now draw your Christmas tree on the front of the folded piece of paper. Make sure that the edge of the tree overlaps the side of the paper so that the tree will join. We’d recommend leaving at least 1cm width for the join so the trees won’t tear when you open the paper back out.
When you’ve sketched your tree shape use scissors (make sure to watch little ones when doing this!) to cut along the pencil lines. Once cut out, unfold your paper to leave yourself with Christmas Tree paper chains!
Top tip: If you want nice neat symmetrical paper chains make sure you have your base in the middle of the paper and that the top of the tree hits the centre of the top of the paper.
Painted snowy pine cones
Another super easy Christmas craft and a great one to do with kids to make extra decorations for the tree.
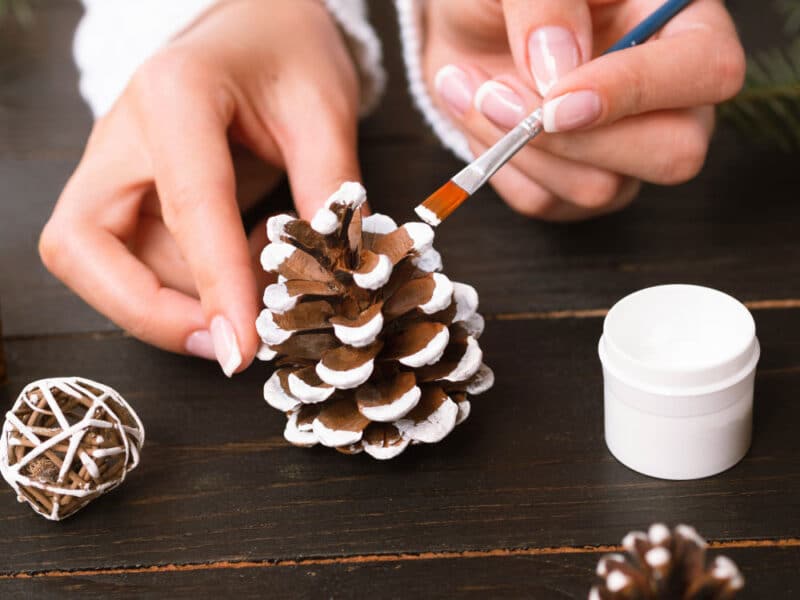
To create these, simply collect some pine cones whilst out and about with the kids. Once back, make sure the pine cones are dry, and then get hold of some white paint (acrylic paints work well for this). Paint each tip of the pine cone to create a snowy look.
Once dry, you can then add some string to the cone to tie and attach to the Christmas tree! This is great if you’ve gone for a natural theme for your tree this year and looks great.
Christmas paper wreath
We love to make our own Christmas wreaths every year in our house. However, it tends to be a bit too stressful with the kids getting involved. However, a great way to keep them busy whilst you’re working on your wreath is to let them go wild with their own!
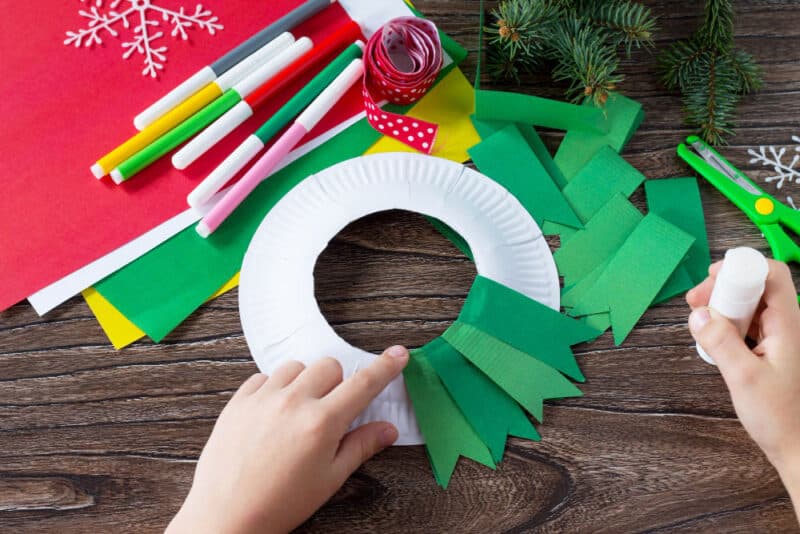
Simply grab a paper plate and use a circle template to cut out the centre. Raid the craft drawer for any colour paper (a few different greens are really helpful here for the base). Cut out strips as shown above and then attach them with glue all the way around. Once you have your base, you can then accessorise your wreath by glueing extra elements like berries or sticks to the top to give a real wreath look. Once you’re done, you can then put a hole in the top of the plate and hang it up with the string.
Christmas-themed lollipop sticks
We tend to collect lollipop sticks in our house as they’re always useful for arts and crafts. If you have some in your craft supplies, creating Christmas-themed lollipop sticks is another easy activity for your little ones to get creative.
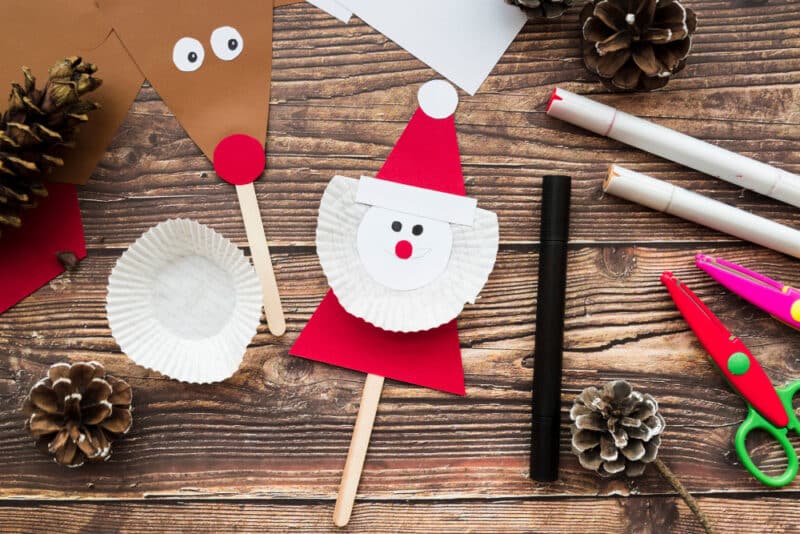
Shown above are a couple of examples of creating Santa Claus and Rudolph on lollipop sticks. You can also create snowmen and gingerbread houses in the same fashion! The key is to take your lollipop and start with the base layer, which will be the largest backing section. For example, above it was a brown triangle for Rudolph’s head or a red triangle for Santa. Once you’ve attached this to the lollipop stick with glue, you can then build up your scene on top of this base layer. If you need to add detail you can then use marker pens to draw this on.
Christmas decorations with lollipop sticks
Last but not least, and again using lollipop sticks, you can paint and glue the lollipop sticks together to create your own Christmas decorations. To do this, you may need to cut down some of the lollipop sticks and you may need to help little ones with this.
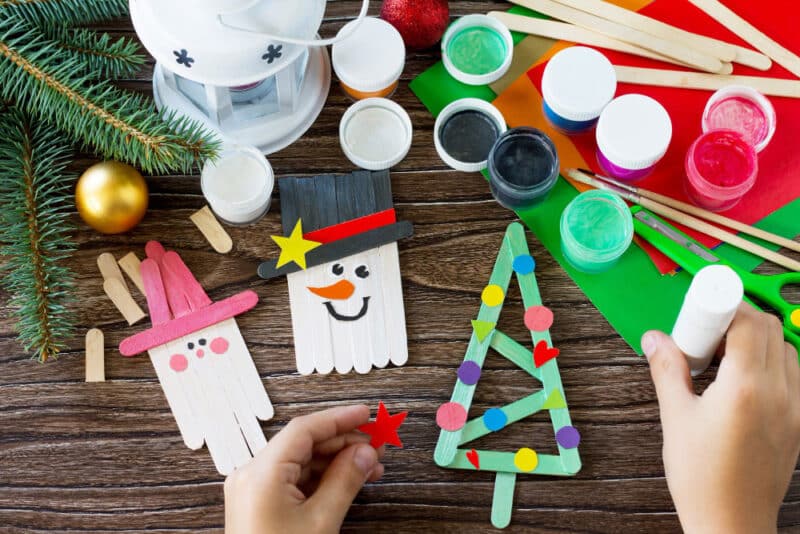
A few simple ideas include a Christmas tree which uses just 3 or 4 lollipop sticks. Once all glued together you can then paint it green and decorate!
More complicated examples however include a snowman with a hat. Line up six lollipop sticks and then lay a lollipop stick across the top for the rim of the top hat. You can glue this and it will join all your sticks together. After you’re done you can paint and add the eyes, nose and mouth. Simple!
We hope you’ve loved our top 5 Christmas crafts to do with the kids this festive season. As always, we LOVE to see your creations so please share them with us on social media using @Stickerscape or #stickerscape.


