I thought today I’d take a bit of a break from writing about wall stickers and give a quick tutorial for a little craft project I recently had fun with – making wool covered letters!
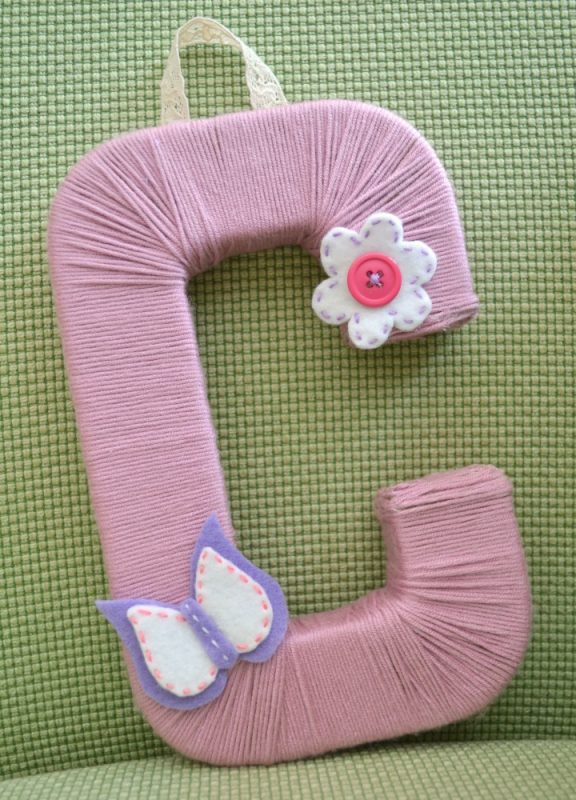
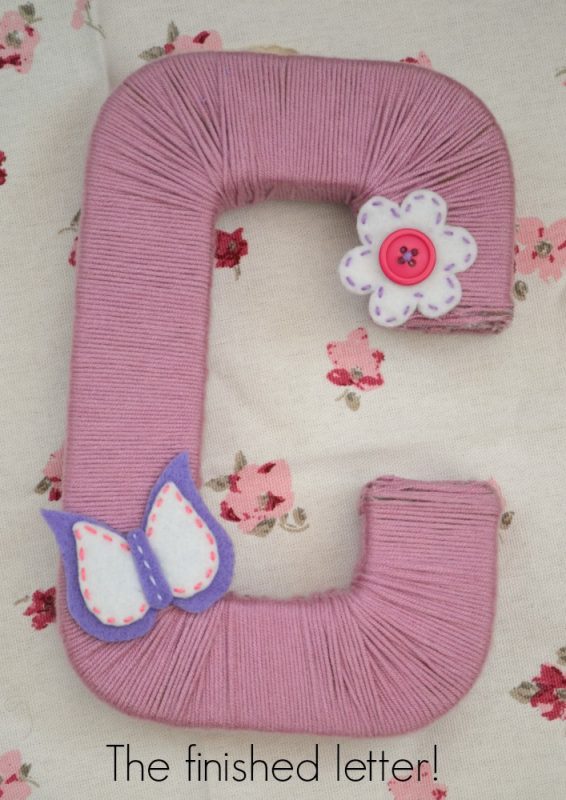
This is something I’d seen online a while ago, and I’d been looking forward to having an excuse to give it a go – so I made this letter ‘C’ as a new baby present for a very special friend, on the arrival of her gorgeous baby girl. I hardly ever feel like I have time to make handmade pressies these days, but I know how much I like to receive them, so occasionally I just ignore the mountain of work (and housework – I love any reason to ignore that!) and indulge in a little arts & crafts session!
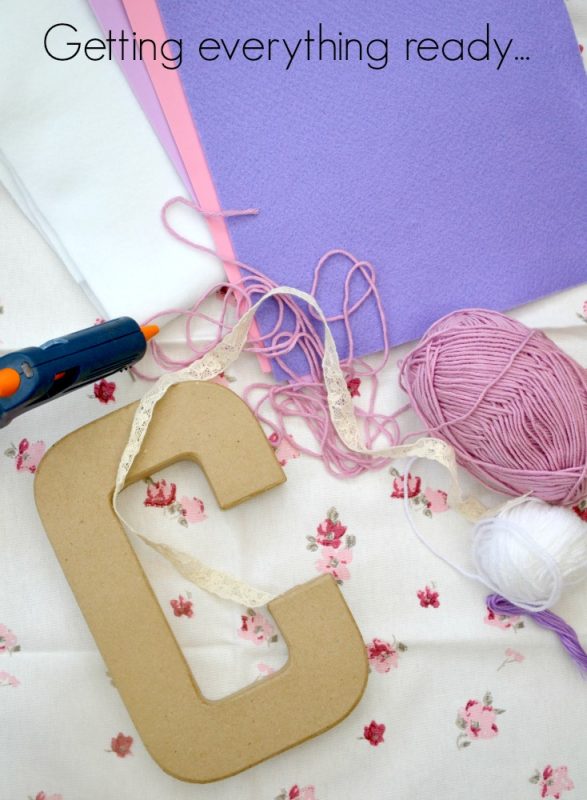
If you fancy having a go at home, you will need:
- a blank letter (I bought one from Hobbycraft for less than £2)
- wool (it does use quite a lot!)
- a glue gun
- felt / buttons to make some embellishments, or you could just use some bought decorations
- ribbon / lace if you’d like to hang it up
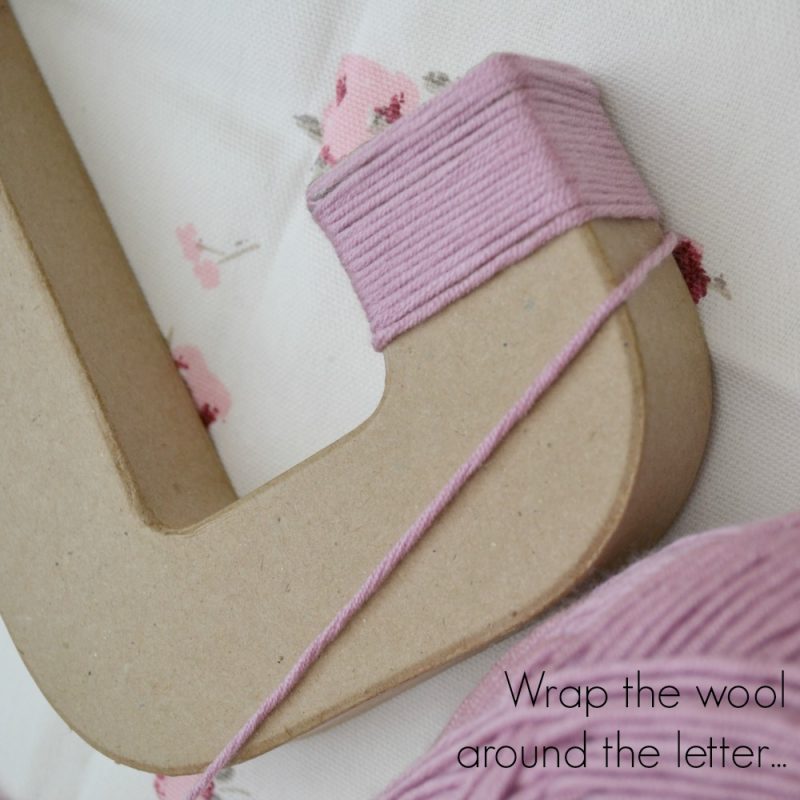
When you’re ready to begin, use the glue gun to put some glue on the end of the letter, and start to wind the wool around it. You want to keep the wool as taut as you can, and push each new line of wool really close to the last one to avoid gaps appearing.
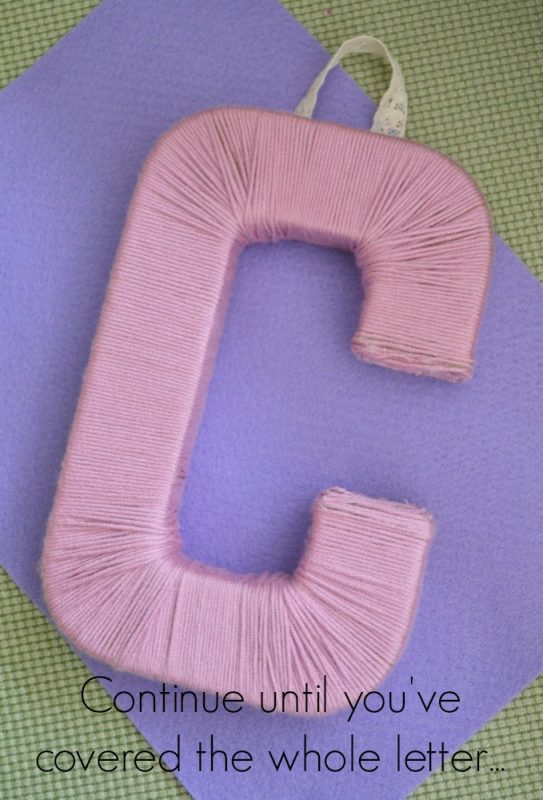
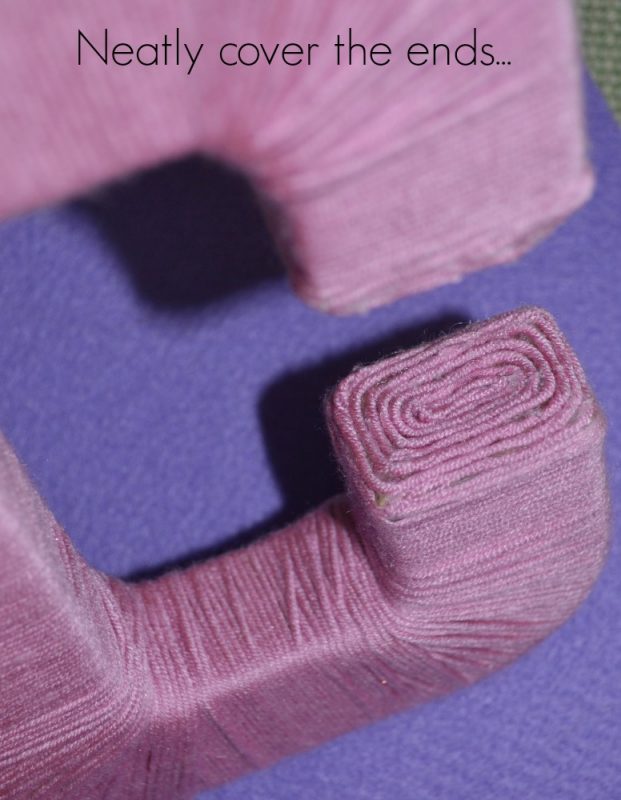
Keep going until you’ve covered the whole letter (at this point, if you’re anything like as impatient as me, any tentative plans you had to do a whole name rather than just an initial may start looking less attractive!). This stage probably took about 15 minutes to make sure the completed letter was nicely covered. I didn’t use extra glue as I was going round the letter, but if you were worried about gaps appearing you could do. You’ll notice from the pictures below that I also covered the very ends of the letter in a spiral type pattern with the wool (this bit definitely requires a lot of glue!), and I added a lace ribbon to the back so that the letter could hang up.
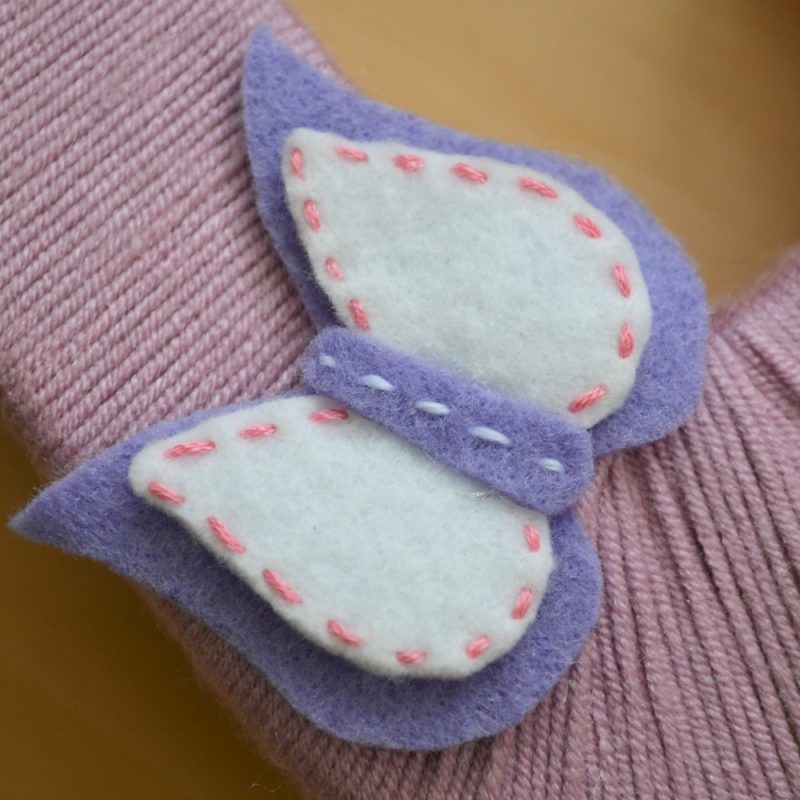
Then it’s time to move onto the fun of decorating. Not only does this make the letter look really pretty, it has the additional benefit of allowing you to cover up any parts of the letter that didn’t go as well! I decided to make a flower and butterfly for my letter ‘C’, but you could really make anything you fancied, or for a speedier option, just buy some pre-made embellishments and stick them on.
My flower and butterfly were both made from felt. My sewing skills are sadly nothing to be proud of, but even I managed to make a basic running stitch look passable (without having to call in help from mum, which I’d normally do fairly instinctively on hearing the word ‘sew’). It’s amazing how much prettier the shapes looked with the little stitches, and a button to finish the flower completed the look 🙂


Finally, I just glued the embellishments on (in my strategically chosen places!) to complete the letter.
I’d love to create something similar for Emma’s room – maybe if I’m feeling brave I’ll even attempt all four letters (thank goodness for having picked a short name!).
If you’d like to try this, and you have any questions, please do let me know 🙂
In the meantime, I hope you enjoy the rest of your long weekend – it’s Emma’s 2nd birthday party next weekend, so I’m getting back to my planning and preparing!
Jo xx


