If you’re a regular reader of this blog, you’ll know that last month we celebrated Emma’s 2nd birthday with an ice cream themed party at home. I can hardly believe it’s not months and months ago now – it was a gorgeous sunny day, and currently the idea of sitting out in the garden in a sundress eating ice cream sounds horrendous (well, maybe not horrendous – if I could wear about 5 layers, have a snuggly blanket to hand, and the ice cream was good enough, I’m sure I could just about manage)!
Anyway, when I published my first blog about the party, I promised a second to come as there were far too many photos for one blog. Well, better late than never – and to remind us of happy summer days, here it is x
As I’ve mentioned before, I seem to have a small tendency (ahem) to go a *weeny* bit overboard when it comes to Emma’s parties… so this post is all about the little details and arts & craftsy bits we (ok, mainly I) had fun making! There are loads of great party and ice cream ideas out there, I’d have loved to try even more if time was no object (I wish) and my party planning wasn’t generally restricted to the hours of 11pm – 2am! Vin found all my excessive theming hilarious (until I suggested he wore an ice cream waiter’s outfit, at which point he stopped laughing, teehee). He did say that he was half expecting to come home one day to find a giant flake installed into the roof of our house, but for the record, I never even considered that 😉
Decorations
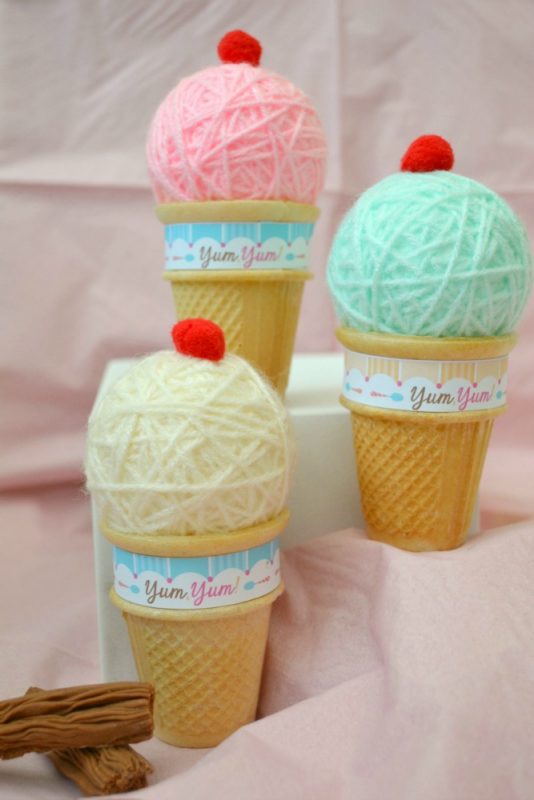
I found the most wonderful ice cream garland tutorial here, which I used to make some really cute ice cream decorations. Having experimented recently with a wool covered letter, I thought the idea of covering polystyrene balls in wool was genius (I realise that this statement may indicate that I’m a bit loopy), but they were just so effective and easy! A couple of evenings making them in front of the telly for an hour or so was all it took to have a big pile of wool covered balls. I used small red pom-poms for the cherry decorations on top, and printed the label included in the tutorial, which fitted the cones I bought perfectly. A bit of glue-gun action later (standard evening at my house!) and they were all finished, and I put them out on the cake table, mantelpiece and shelves, as well as hanging them from invisible string against the walls. I only wish I could store them away for another party, but sadly since they are real cones they’re destined for the bin 🙁 I’ll keep the polystyrene balls though, I’m already hatching plans for an arts and crafts session with Emma making them into Christmas tree baubles!

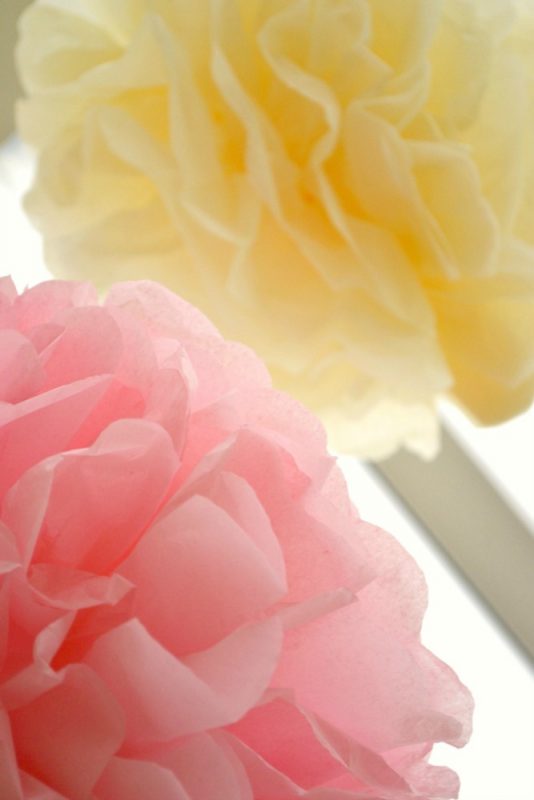
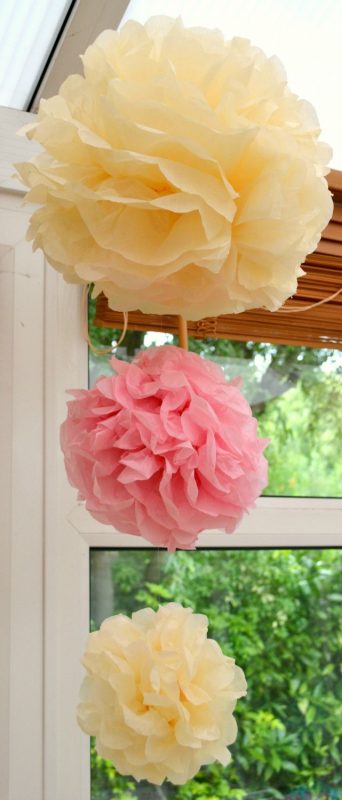
The party was also a great excuse to have my first attempt at making tissue paper pom poms, which I hung up inside from our high conservatory roof. There are tutorials all over the web for these, but one really useful size guide I found, which I used as a starting point is available here (thanks Heidi!). If you’re thinking of making these for a celebration, I’d definitely recommend it – they are quick, cheap and really effective when hung from invisible thread. I stuck to 2 colours for a simple, pretty finish. And happily these can (and will!) stay up long after the party’s finished 🙂
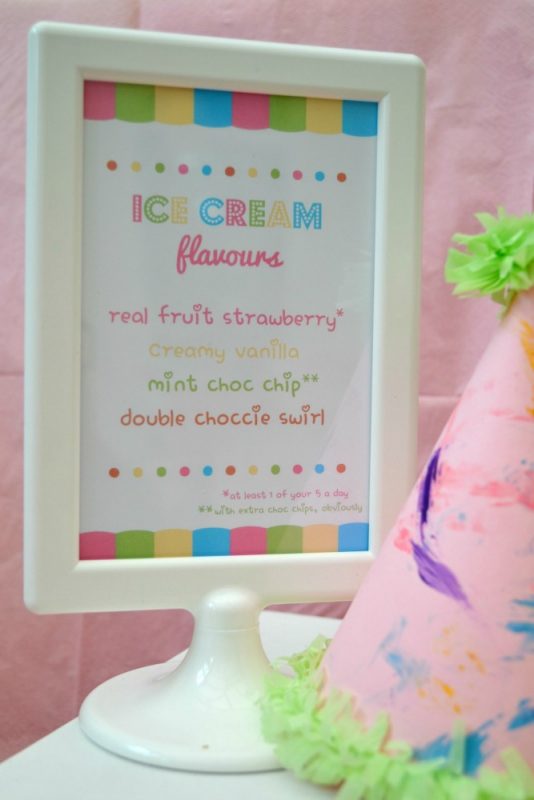
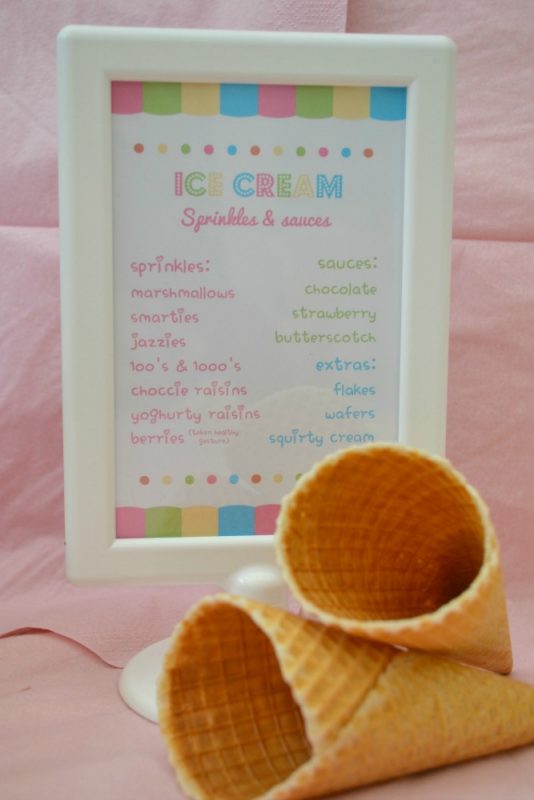
I also made a few bits and pieces for the ice cream table. I bought some double-sided photo frames from Ikea (only £1!) to show the guests what the ice cream flavours were. I got a bit carried away and did one for the sprinkles too, although I’m sure most people would be more than capable of telling apart goodies like smarties, 100s and 1000s and flakes!
I bought some cute wooden spoons for a party back at Easter, and covered them in different washi tapes to put out with the ice cream tubs (because clearly 2 different edible cone options wouldn’t have provided enough choice for people, hehe!).
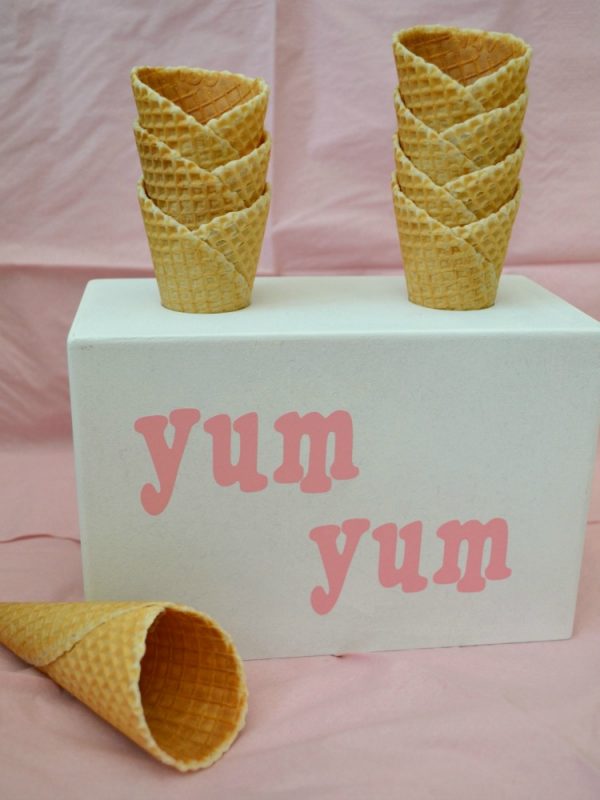
And then I thought of a way to use a sticker! My Grandad made me a little stand for the ice cream cones (if you read the first blog about the ice cream cart he made, you’ll already know he’s rather handy at this kind of thing!) and I put some sticker lettering on it… showing that yes, stickers can be useful for anything 🙂

Accessories
Ok, so I might be over the top, but who doesn’t love a few party accessories?!
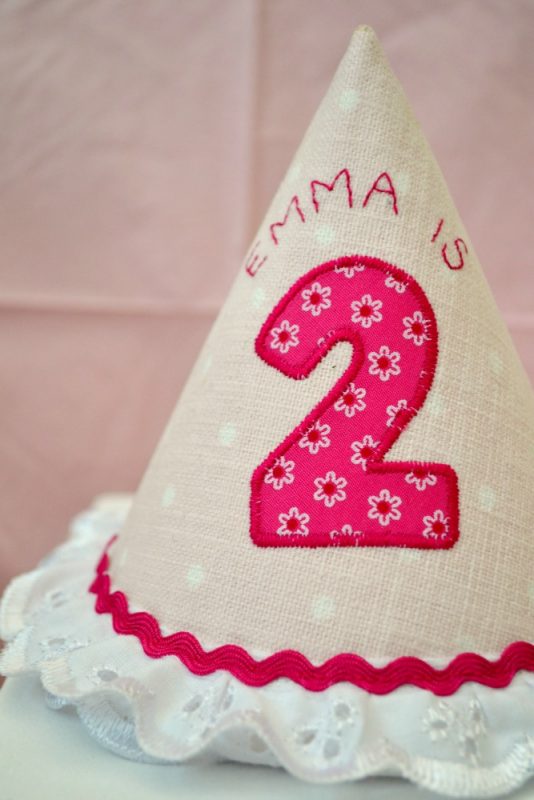
My absolute favourite was a surprise gift from our wonderful mummy friend Claire of Claire Hurd Design. She made Emma the most gorgeous hat, which Emma must have loved as much as me as she happily wore it all day. Claire is as talented as she is lovely, and incidentally her baby blankets make the most scrumptious new baby or christening gifts I’ve found in a long time 🙂
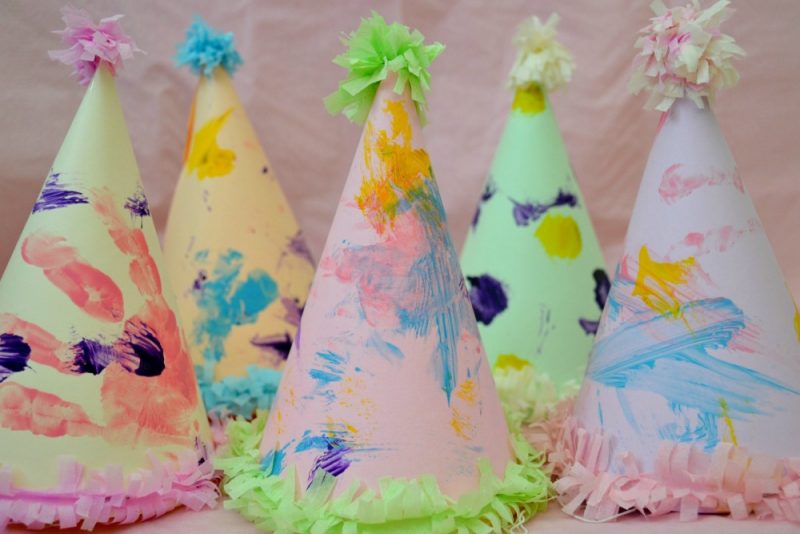
Emma also decorated a supply of paper hats for all the children – she had a fab time painting all the card (albeit then very much left mummy in charge of making them into hats)! I think you could certainly say each was unique 😉
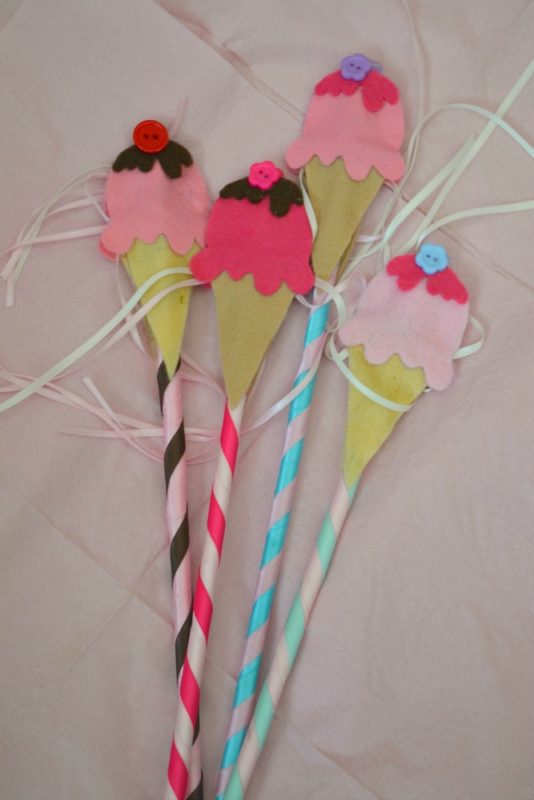
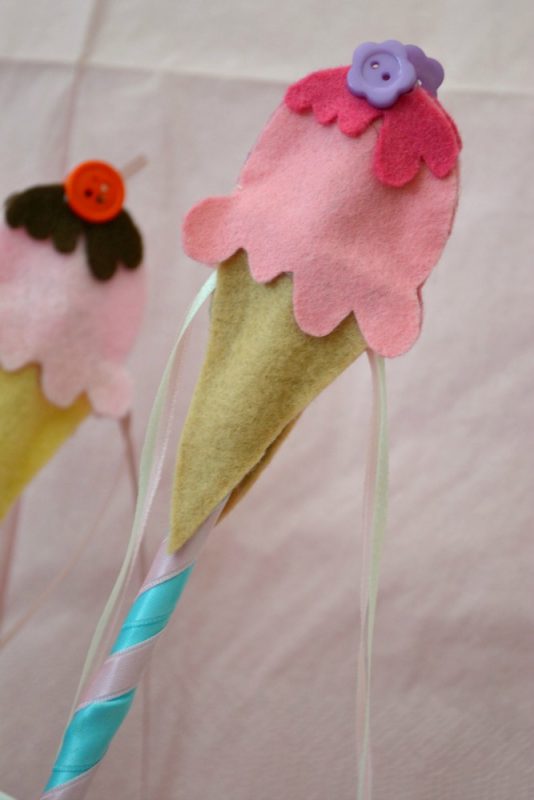
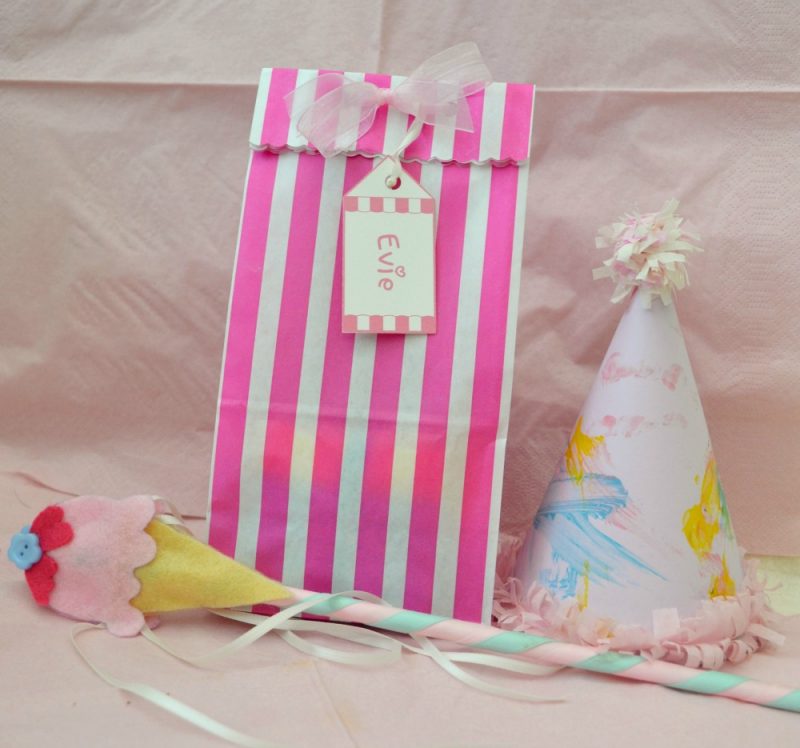
Finally, I made a selection of ice cream wands for me (sorry, I mean the children) to play with and take home. They were just round-bottomed cake dowels covered in ribbon, with ice creams I’d cut out of felt on the top and buttons for decorations. Totally unnecessary, but so pretty!
Party Bags
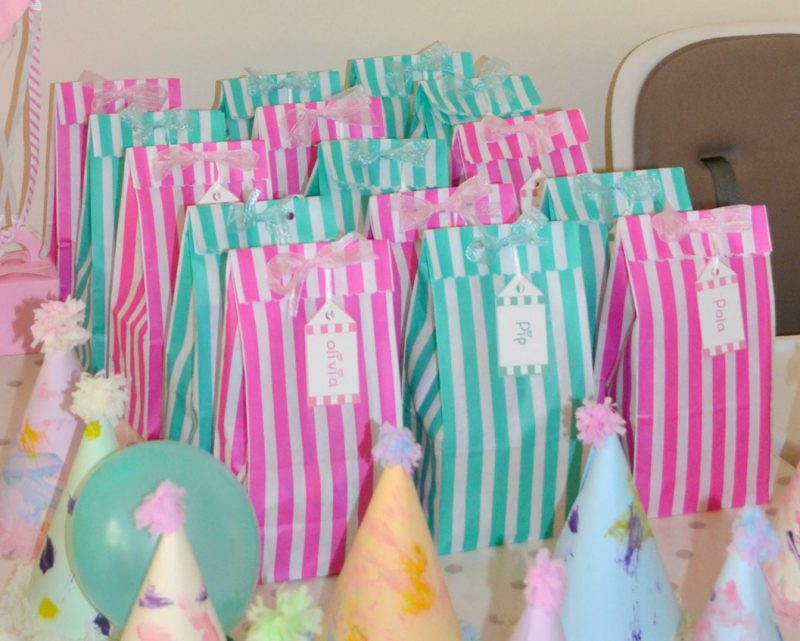
For me, party bags are right up there in the list of things I love best about kids parties! I have such fond memories of helping mum with mine when I was little, picking out all the bits and organising them into bags for all my friends, and I really enjoy thinking about what’s going to go into each of them, and making them look pretty. This year I went for simple candy-striped bags in pink and turquoise, finished with sheer ribbon bows and name tags. When you’re 2, it’s all about what’s inside anyway!
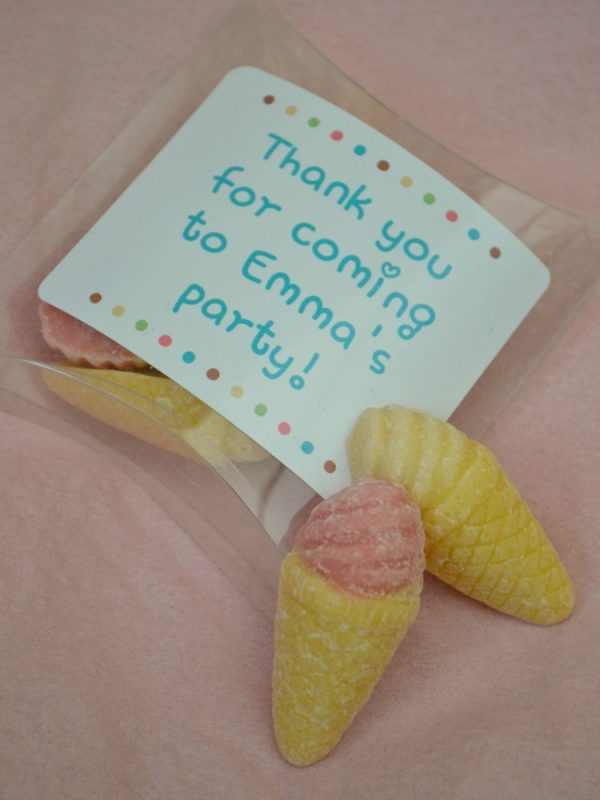
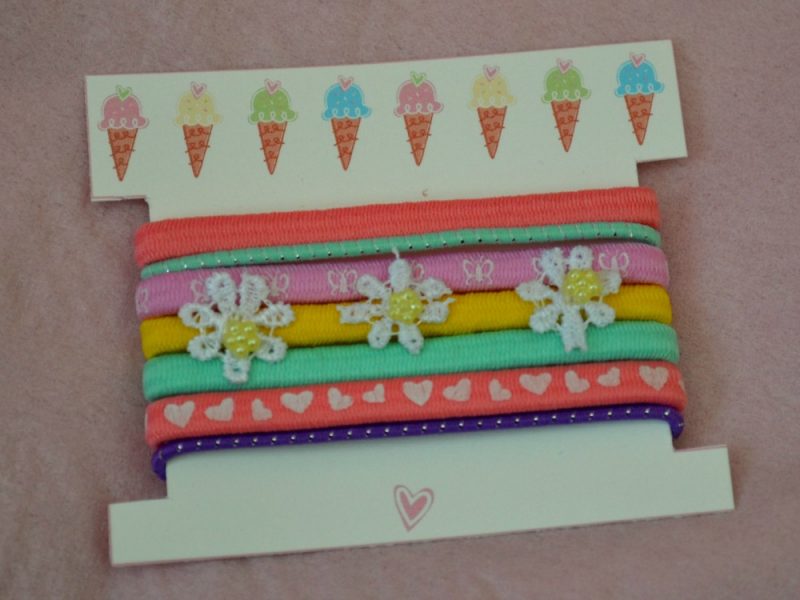
We had fun hunting out small ice cream goodies on the high street, and managed to find ice cream pencils, notebooks and sweeties (which I put into little boxes, decorated with a Stickerscape sticker, naturally!). I was tempted to make some hair bows for the girls using some cherry pattered ribbon I found, but in the end time won over and I cheated by buying normal hair bands and hair clips, and making little ice cream cards to put them on! Some other fun bits like stamper-pens, funny glasses and fruit bars completed the older childrens’ bags, and for the very young ones I got little books, bath toys, socks and t-shirts. I have since had to physically restrain myself from starting to buy bits for next year’s party bags…I just seem to see potential party bag goodies wherever I go!
So, I suppose now I have to acknowledge that the party madness is over for another year , unless I can come up with an excuse for another celebration in the meantime (Halloween’s just around the corner you know!!).
Have a good weekend everyone xx
